Bruker Instrument User Guide
Bruker
Experimental Workflows
Bruker Operation | Transmission Mapping Workflow
Bruker Operation | MacroATR Workflow
Instrument Orientation
Detectors and Liquid Nitrogen
Both the single point mapping (MCT) and imaging (FPA) detectors are cryogenically cooled for operation with liquid nitrogen. A single detector fill will last at least 12 hours for the MCT and up to a maximum of 8 hours for the FPA.
- It is very important not to allow the FPA detector to warm up while is it powered on.
- The MCT should be allowed to thermalize for 20-30 minutes after filling.
The detector will be initially filled with liquid nitrogen for you by beamline staff, however you will need to plan your experiments to accommodate refilling the detector.
Appropriate PPE is available at the beamline and must be worn whenever handling liquid nitrogen. If you are unsure how to fill the detector or have never done it, ask a member of the beamline staff to demonstrate. You should also have completed the cryogenics safety training module.
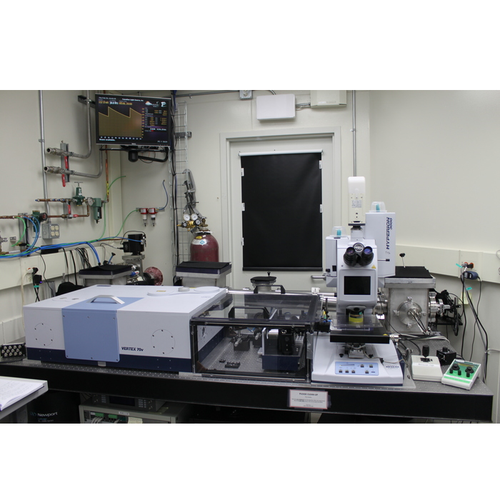
Spectrometer and Microscope
The instrument consists of a spectrometer (Vertex 70v, on left), the transfer optics (plexiglas box in center), and the Hyperion 3000 microscope (right). Synchrotron radiation enters the spectrometer from the rear out of the active optics chicane.
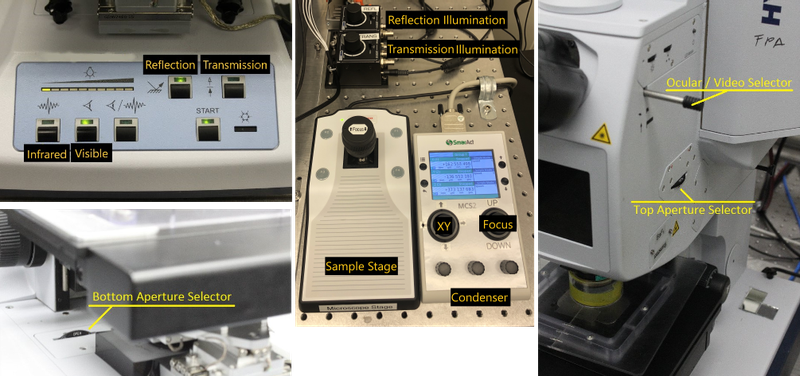
Microscope Controls
Software
OPUS is the primary software for instrument control and data acquisition.
Experimental Parameters
The primary experimental parameters which influence measurement time are mapping step size, spectral resolution, and the number of co-added scans.
Experimental Setup
These steps should be completed for you by beamline staff, however, you should confirm the detector cooling before starting your work.
- Fill the detector(s) you will use for your experiments.
- Confirm the installed objectives match the desired magnification.
- Start OPUS using the icon on the desktop.
- Configure Transfer Optics for experiment.
Load Sample
The purge system on the microscope stage reduces spectral interference from infrared-absorbing atmospheric gases such as water and CO2. Sample loading procedure:
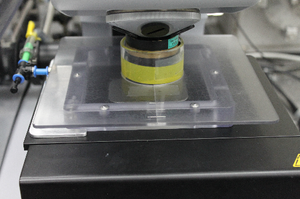
- Mount your sample onto a sample plate. Use tape to secure sample disc to the plate.
- Remove the plexiglas purge components and rotate the top objective out of the way.
- Place your sample onto the microscope stage and return the objective to the working position.
- Reassemble the purge system around your sample.
You may find it helpful to mark key stage positions in the OPUS Video Wizard before closing the purge system, as it can be hard to see the sample position once the purge cover is in place.
Video Wizard
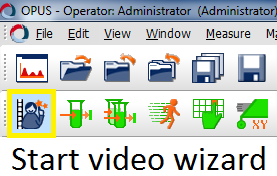
In OPUS, open the Video Wizard using the "Start video wizard" button.
This will launch the microscope wizard and bring you to the Select Device window. Refer to the following Experimental Workflows to determine the correct entry for your experiment.
Experimental Workflows
The system is now ready to begin sample measurements.