1. Load method file
In Resolutions Pro Imaging Method Editor, select your method file from the "Users" folder.
2. Find Centerburst
Press the "Find Centerburst" button.
- This will check operation of the interferometer and determine the current centerburst position.
- Note this uses an internal detector and can be performed regardless of sample position in the microscope
3. Focus sample
Sample position / focus can be controlled using the joystick or the Agilent Wizard Stage Control and Focus Control tabs.
- View the sample using "Visible Image"
- Switch to viewing the sample through the microscope eyepiece.
The spot that is in the cross-hairs of the eyepiece will be close to the center of the measured ATR region
Tip: If your samples are time/air sensitive, you can skip placing them on the stage now and wait until step 7. The background for the measurements is made with the Ge crystal in air, the sample does not influence the background.
4. Insert ATR crystal
Slide the Ge micro-ATR crystal assembly in place.
- The crystal will travel 1-2 mm above your sample at visible focus.
- Germanium is brittle and easily scratched. Check for interferences with this sliding motion.
5. Non-Uniformity Correction Calibration
Open Resolutions Pro Imaging Method Editor "Live FPA" window
- Check that the FPA is at the operating temperature ( <80 K)
- Select "Show Raw Data", "High Range"
- Adjust the vertical slider bar (integration time) so that the displayed signal is not greater than 70% of the full height.
The 70% line is between the "Frame Rate" and "Frame Period" text lines. - Click "Calibrate" to perform the correction. The results of the correction will appear.
You may wish to make a note of the integration time and resulting LowFlux/HighFlux values.
6. Measure background
Click "Background" to start the background / reference measurement
- When the "Save as" dialog appears, navigate to the appropriate file location and then enter the background file name.
- Check the resulting IR image for appropriate signal levels or undesired material.
- If you see a central speckle pattern in the background image, you have too much light on the detector. You should repeat the calibration and lower the integration time slider.
Tip: Do not re-use background file names.
7. Visible sample image
- Slide ATR crystal into visible light position
- Open Resolutions Pro Imaging Method Editor "Visible Image" tab.
- Confirm sample position and focus
- Click "Capture"
- Using Windows Explorer, copy the
VisMosaicCollectImages_Thumbnail.bmpfromVisMosaicCollectImagesto sample folder
8. Approach sample
- Slide the Ge crystal assembly into the measurement position
- Click
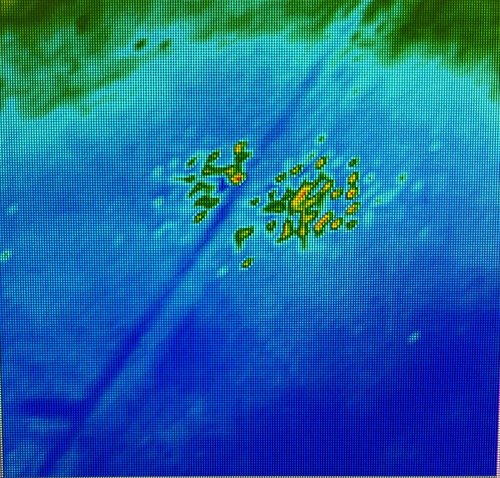
Live FPAand selectshow Calibrated data - Adjust the contrast to teal/green or green/yellow range
- Watch the live Lancer Calibration view and use the fine adjust knob on the joystick to slowly approach the sample (raise the stage)
- A change in the image indicates ATR contact with the sample.
- Move the stage very slowly upwards until there is contact across the measurement field of view
Travel distance will vary depending on the sample hardness, initial contact expected around 200-300 z units of travel
9. Start sample scan
Click Scan button and save in the same folder as the background and visible image.
Next sample / region / pressure
After collection, review the spectra across the IR image.
If the absorbance values are low, there may not been sufficient contact with Ge crystal. Repeat from Approach sample and gently approach another 50 z units (~¼ turn of stage controller)
Before moving to another region or sample, you must retract the crystal to avoid damage.
Depending on your sample, you may need to remove the crystal assembly and gently clean with alcohol/water and lens paper.